Quick answer
To add animations in Canva, select an element or click on the page background, then click Animate in the top toolbar. Choose an animation style and adjust speed and direction. Animations play when your design is presented or exported as a video or GIF.
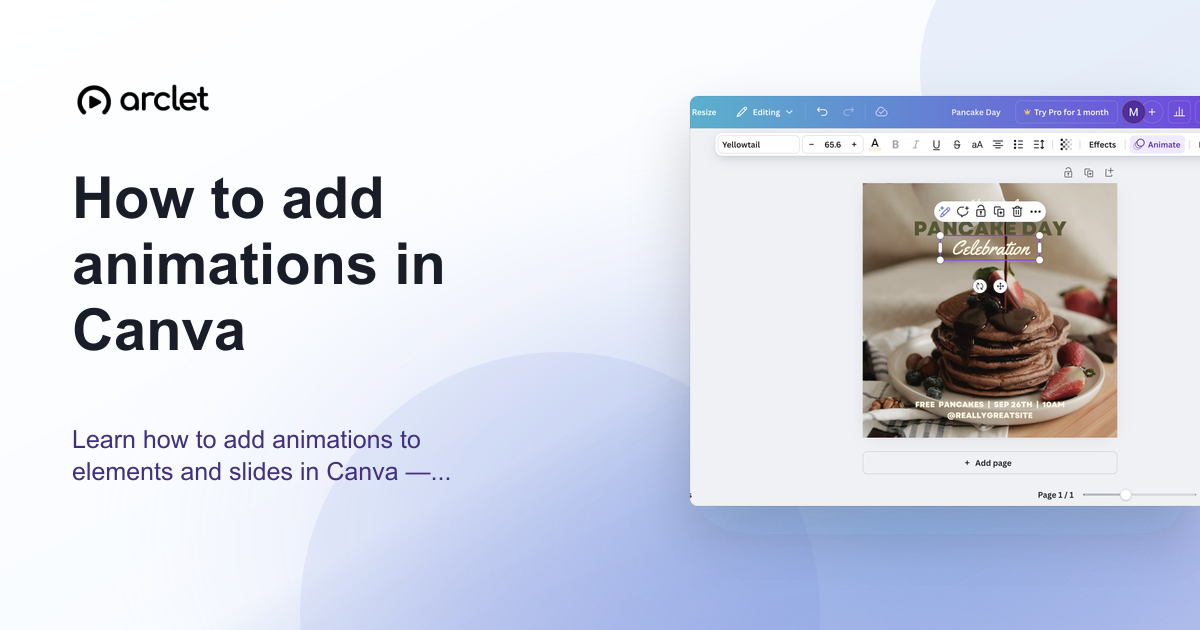
Steps at a glance
- Open your Canva design and select the element you want to animate.
- Click Animate in the top toolbar.
- Choose an animation style from the panel — Basic, Exaggerated, or Photo.
- Adjust the speed slider and direction if available for the chosen style.
- Click Play to preview, then publish or export your design.
Interactive demo
This interactive demo was created free with Arclet in 3 minutes.
Create your own demo →Summary
Canva's Animate feature lets you add entrance and exit animations to individual elements or apply a single animation to the entire page. Animations only play in presentations, videos, and GIF exports — they do not appear in PDF or image downloads. You can mix different animation styles on different elements within the same page.
What is Canva?
Canva supports element-level and page-level animations. Element animations control how individual items enter the screen, while page transitions control how the entire slide appears. Both are available in presentation and video design types.
Step-by-step guide
Step 1
Select the element to animate
Click on a text box, image, shape, or other element in your Canva design. To animate the entire page at once, click on the page background (not an individual element).
Step 2
Open the Animate panel
Click Animate in the top toolbar. A panel opens on the left showing animation categories: Basic, Exaggerated, and Photo (if applicable).
Step 3
Choose an animation style
Click an animation style to preview it on the canvas. Options include Fade, Rise, Pan, Tumble, Breathe, and more depending on the element type.
Step 4
Adjust speed and direction
Use the Speed slider to make the animation slower or faster. Some styles also offer a Direction option to control which way the element enters.
Step 5
Preview and export
Click the Play button at the bottom of the screen to preview the full page with animations. Export as a video or GIF to include animations in the output.
Why this matters
Your presentation looks good but it feels flat compared to the ones you've seen with smooth entrances and motion. You've got an hour before the meeting and you want to make it feel more alive — without rebuilding anything.
Troubleshooting
Animate button is not visible in the toolbar
The Animate button appears in the toolbar only when you are on a presentation or video design, or when you select a supported element. Check that you have not selected a grouped element — click the group to enter it, then select an individual element.
Animation does not appear in the downloaded file
Animations only export in video (MP4) and GIF formats. If you download as a PNG or PDF, animations are not included. Switch the export format to MP4 or GIF.
Frequently asked questions
Can I animate individual words in a text box?
Yes, with some animation styles. Select the text element and choose an animation that supports per-word or per-letter effects. Not all styles support this — it depends on the animation category.
Do animations work in Canva presentations shared as a link?
Yes. When you share a Canva presentation link and the recipient views it in presentation mode, all animations play as designed.
Can I remove an animation after adding it?
Yes. Select the animated element, click Animate in the toolbar, and click No animation or the X next to the current animation style to remove it.
Create interactive demos like this one — free, no coding required.
Start for free →