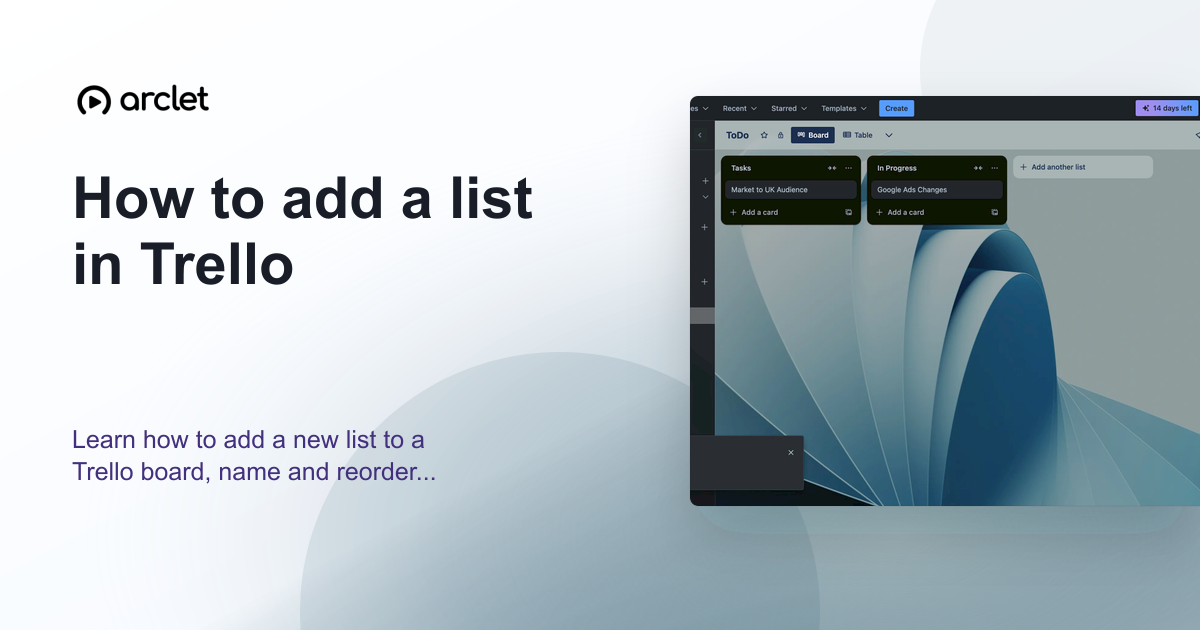
Quick answer
To add a list in Trello, open your board and click + Add a list at the end of the existing lists. Type a name for the list and press Enter or click Add list. The new list appears immediately to the right of the last list.
Steps at a glance
- Open the Trello board.
- Scroll to the right end of the existing lists.
- Click + Add a list.
- Type the list name.
- Press Enter or click Add list.
Interactive demo
This interactive demo was created free with Arclet in 2 minutes.
Create your own demo →Summary
Lists in Trello represent stages or categories in your workflow — for example, Backlog, In Progress, and Done. You can add as many lists as your workflow needs. Drag lists left or right to reorder them, and drag cards between lists as work progresses.
Step-by-step guide
Step 1
Open the board
Navigate to the Trello board where you want to add a new list.
Step 2
Click Add a list
Scroll to the far right of the board. Click + Add a list (shown as a card with a + icon). An input field appears.
Step 3
Name the list
Type the list name in the field. Names like Backlog, Review, Blocked, or Done work well for most workflows.
Step 4
Confirm
Press Enter or click Add list. The new list appears to the right of the last existing list and is ready to accept cards.
Why this matters
Your project has grown and you need a new column — a Backlog, a Review stage, or a completed archive — to reflect how work actually moves through your team. The existing columns aren't enough.
Troubleshooting
I cannot see the Add a list button
Scroll horizontally to the right end of the board — the button appears after the last list. If the button is missing, you may not have edit permissions on this board.
Frequently asked questions
How many lists can a Trello board have?
There is no documented limit on the number of lists per board. In practice, most teams use 3–7 lists. Very large boards with many lists can become hard to navigate.
Can I rename a list after creating it?
Yes. Click the list name text at the top of any list to make it editable, type the new name, and press Enter.
Create interactive demos like this one — free, no coding required.
Start for free →